Configure Hunnt AI WordPress Plugin
The Hunnt AI WordPress Plugin allows you to connect your WordPress website directly with your Hunnt AI account, enabling the Hunnt AI Agent to generate content, analyze your website, and apply Technical SEO enhancements. This guide will walk you through the installation and configuration steps.
Step 1: Install the Hunnt AI WordPress Plugin
To install any WordPress plugin, you can follow the official WordPress documentation here:
https://wordpress.org/documentation/article/manage-plugins/
After installing and activating the plugin, you will see a new menu item in your WordPress admin sidebar named Hunnt AI.
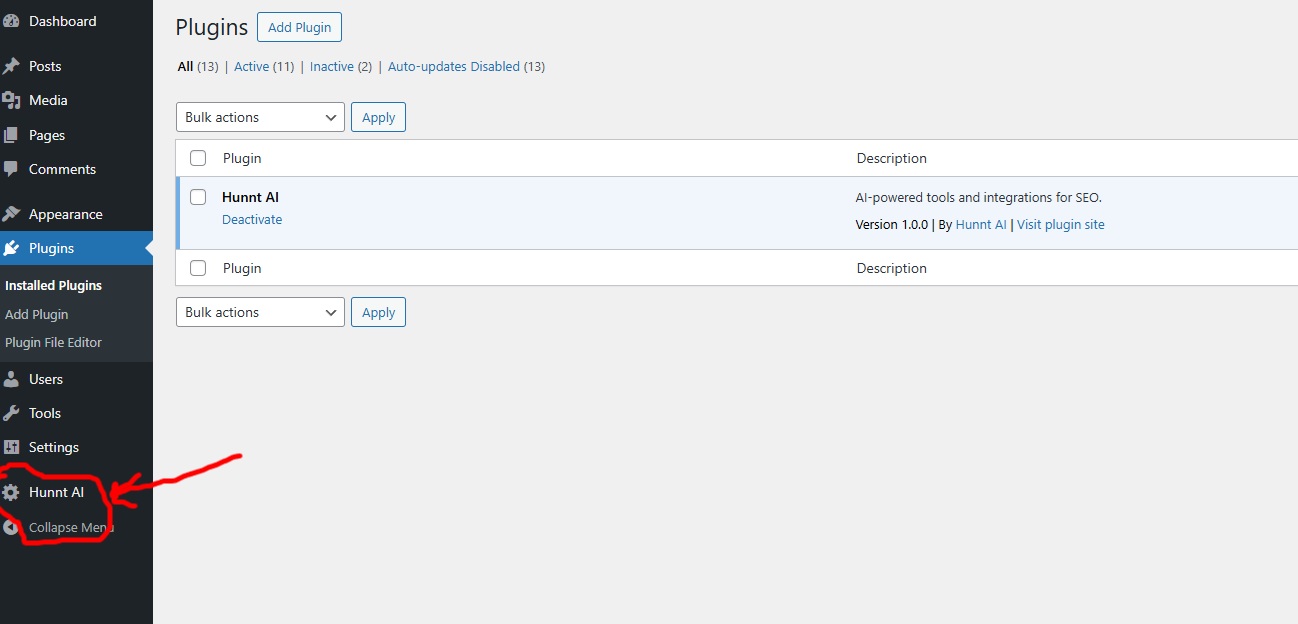
Click on it to start the setup wizard.
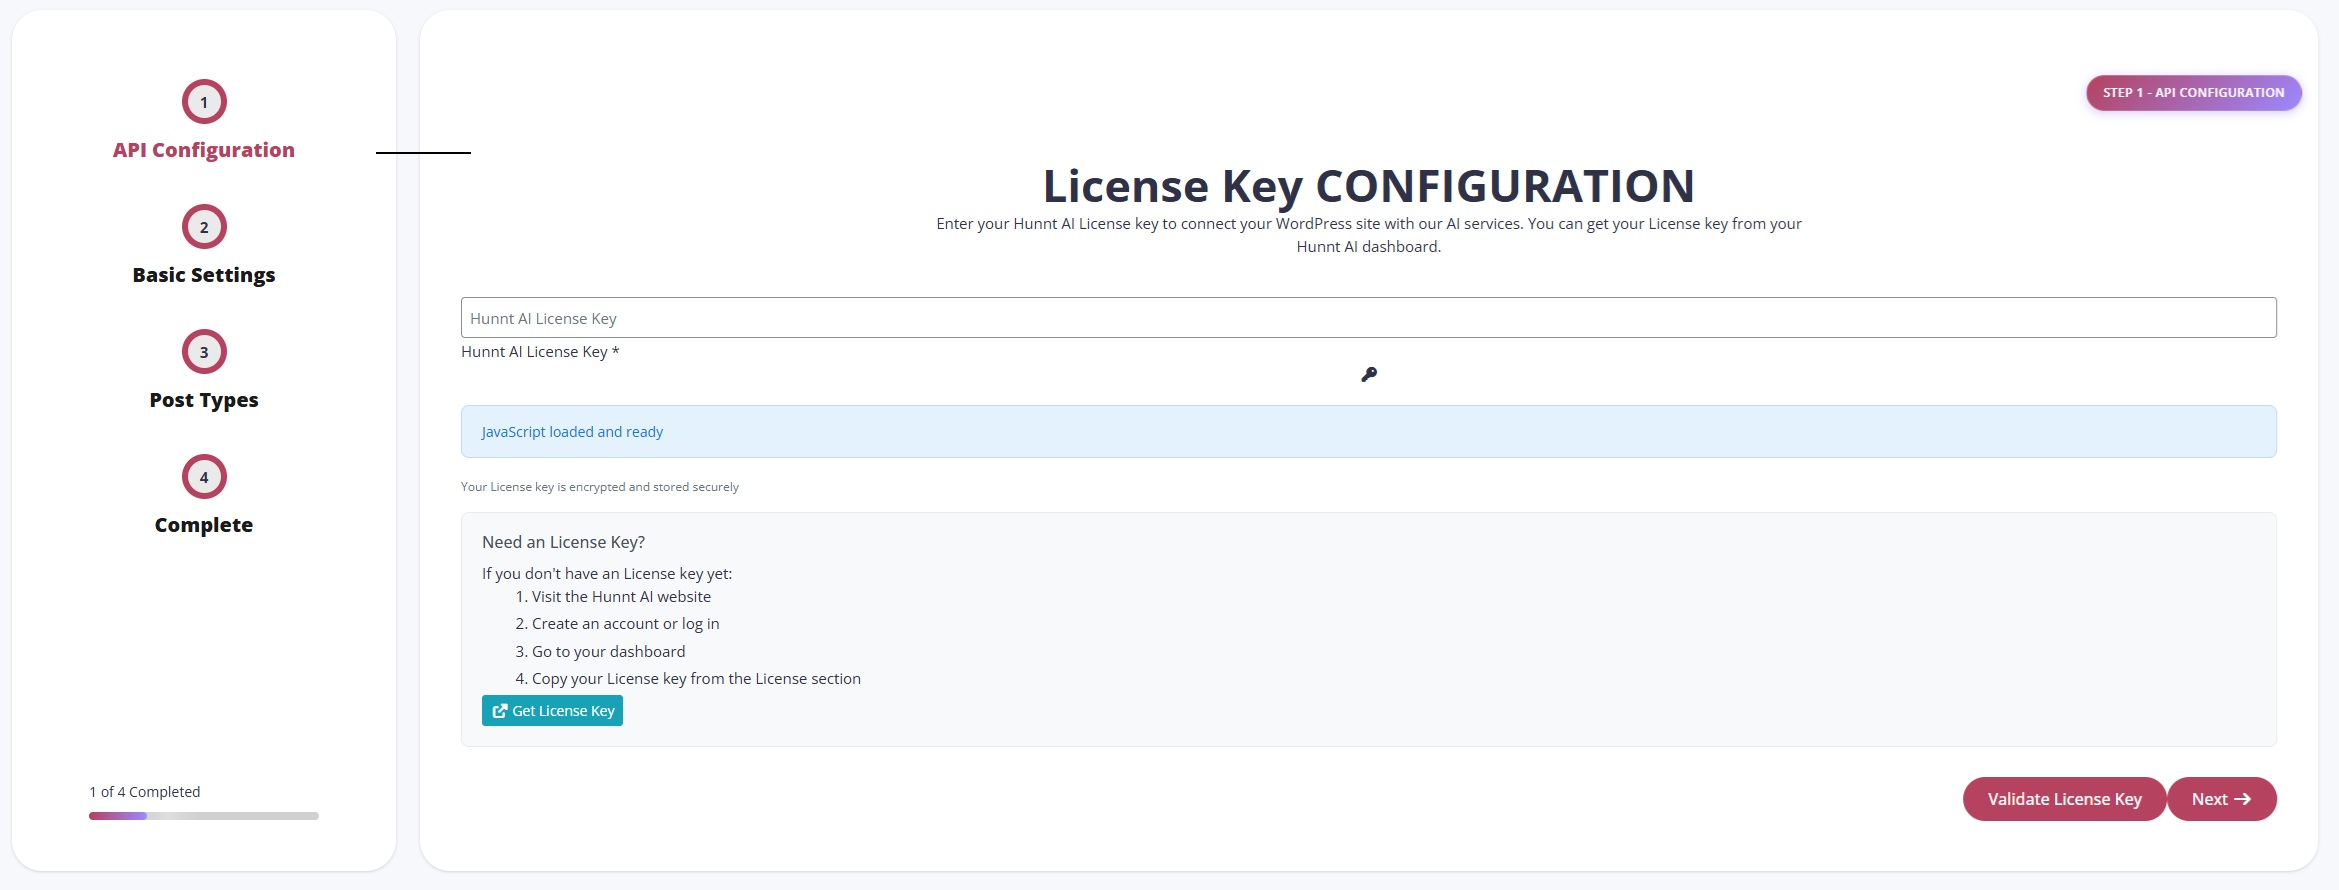
Step 2: Enter Your License Key
The first step in the setup wizard is entering your License Key.
- Paste your License Key into the field
- Click Validate License Key
If the key is valid, you will see a success message confirming that your license has been verified. Click Next to continue.

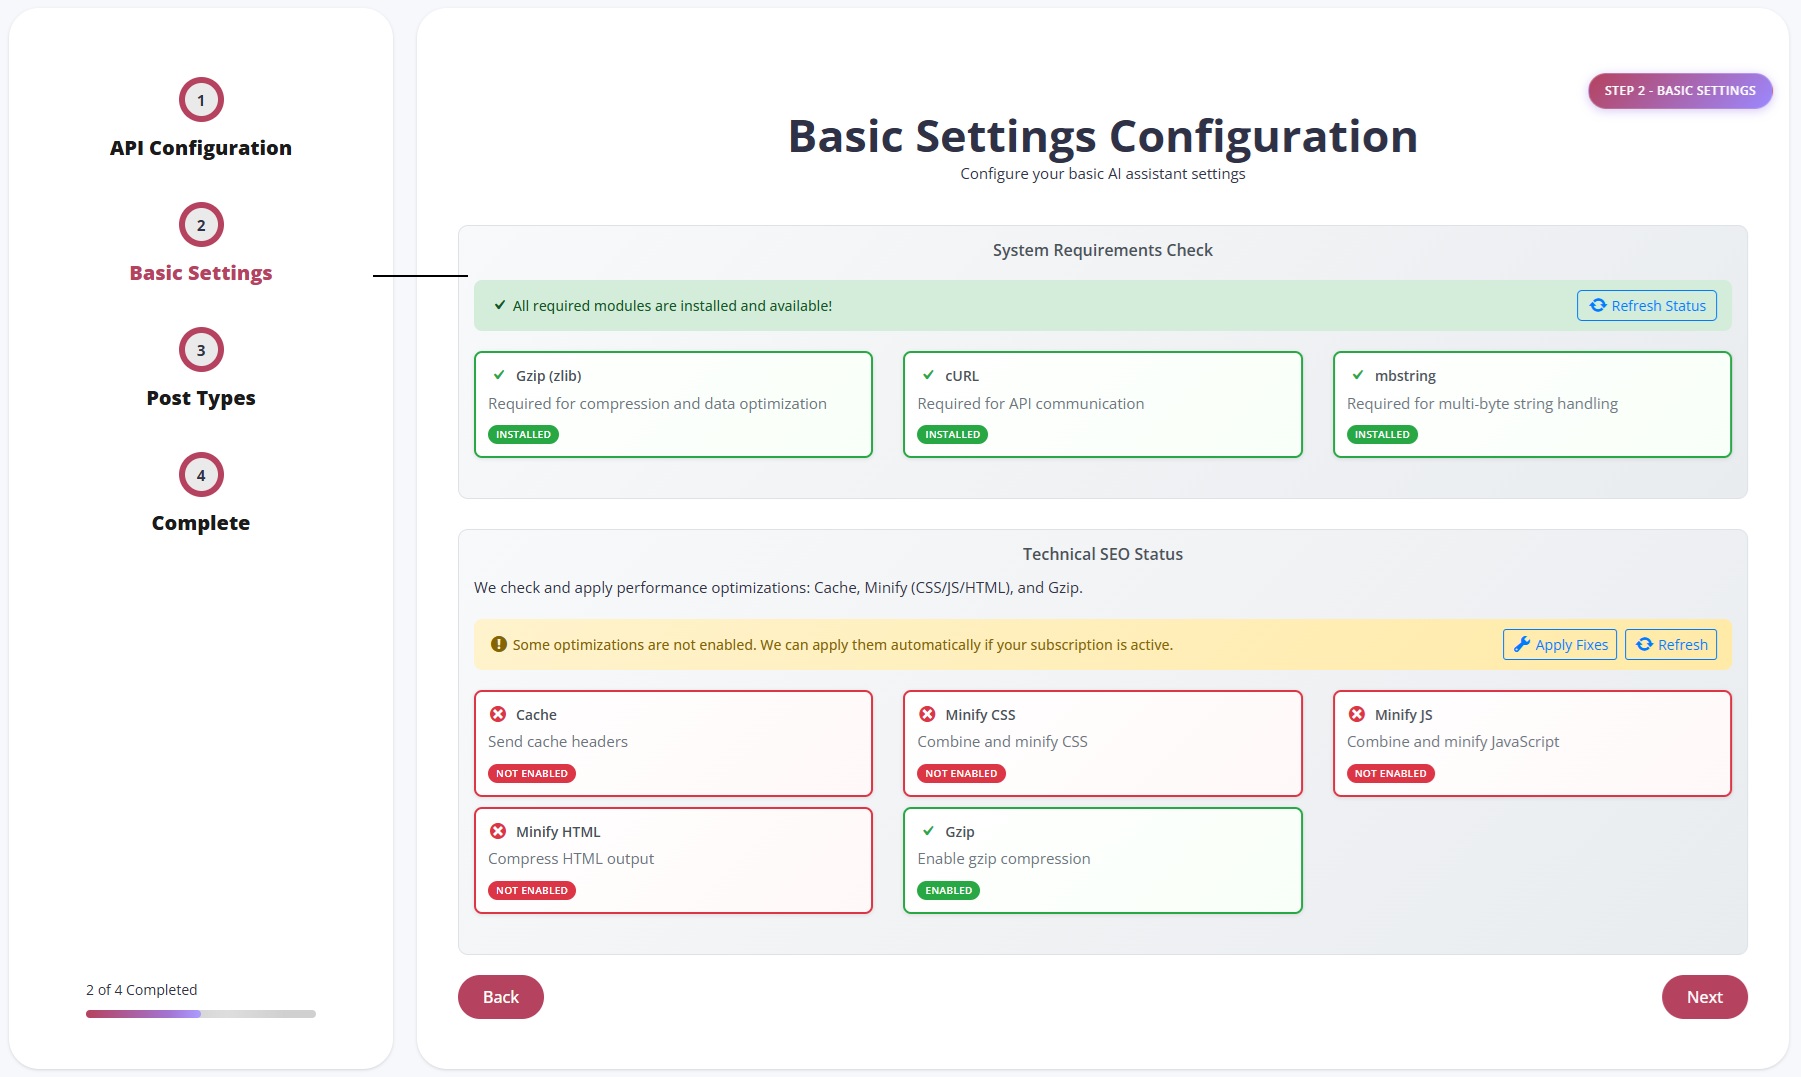
Step 3: System Requirements Check
In this step, the plugin checks whether essential PHP extensions are enabled on your server. These extensions are required for Technical SEO automation.
Required Extensions:
- Gzip (zlib)
- cURL
- mbstring
Performance Optimization Status:
- Cache
- Minify CSS
- Minify JS
- Minify HTML
- GZIP Compression
You can apply these optimizations by clicking Fix Now.
Important Note:
These optimizations require an active subscription to the Technical SEO service — either individually, within packages, or through available offers.
Step 4: Choose Post Types
In this step, select the Post Types where Hunnt AI will generate articles. By default, articles will be created under Posts even if no additional type is selected.
After selecting your preferred post types, click Next.

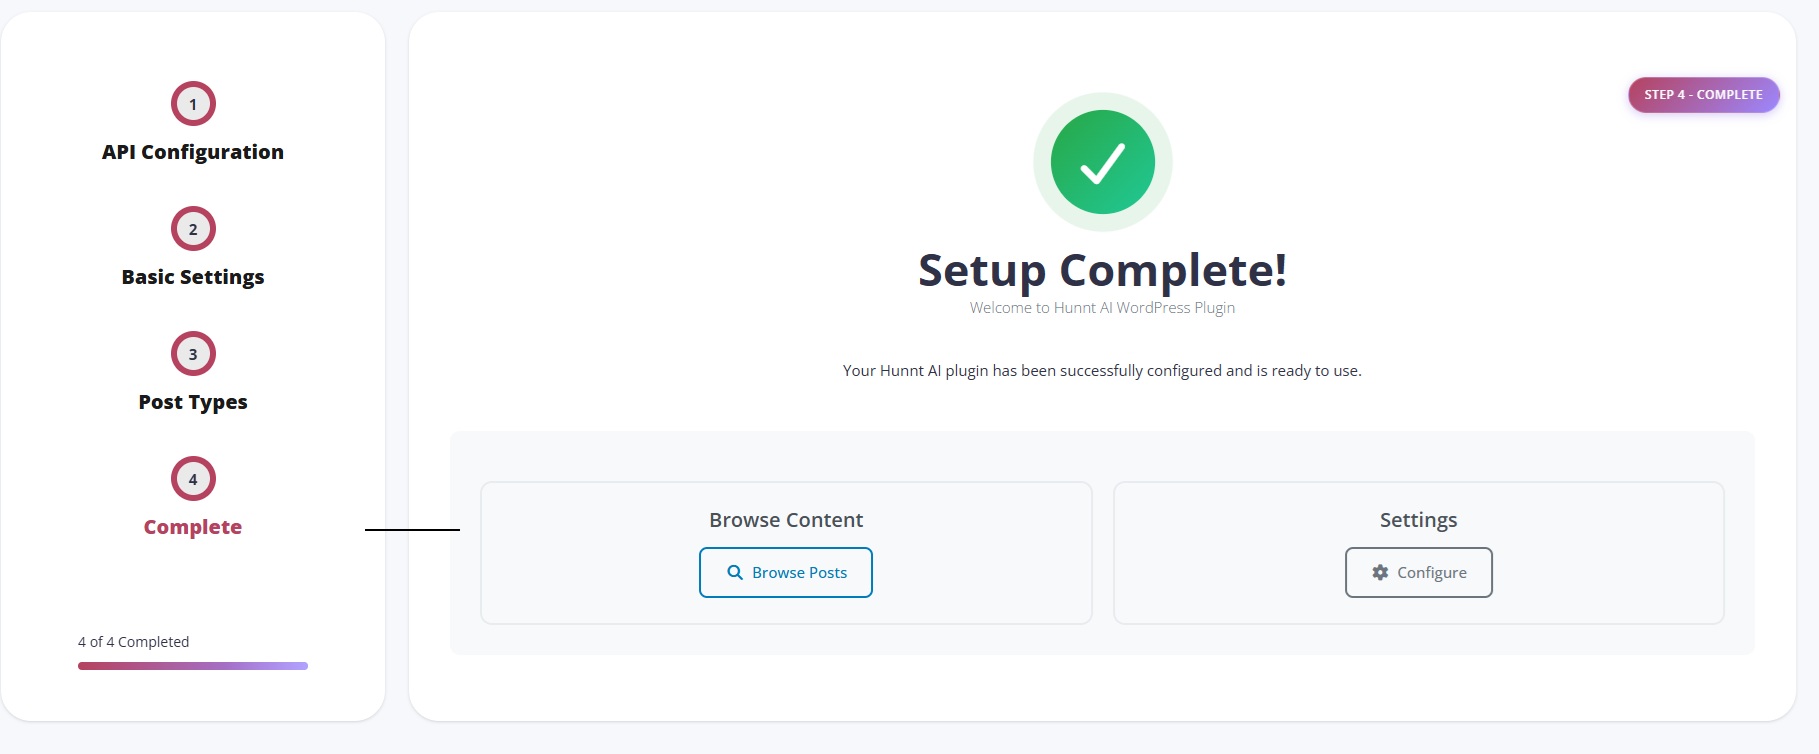
Setup Complete
Congratulations!
Your Hunnt AI WordPress Plugin is now fully configured.
You can now generate articles, apply Technical SEO improvements, and sync your website with the Hunnt AI Agent — all directly from your WordPress dashboard.